Creating Sitemap Page In Your Blogger Blog
You need to submit your sitemap to popular search engines to make your blog pages index by them. Sitemap page in a blog helps the visitors to track the contents of that blog. You have seen sitemap pages in many blogs. Have you thought of creating a sitemap page in blogger blog? Yeah it is possible.This tutorial will help you in creating a sitemap page in your blogger blog.
Steps To Create A Sitemap Page In Your Blogger Blog:-
1) Go to Edit HTML section of your blogger dashboard. Check Expand Template Widget.
2) Ctrl + F and search </head>
3) Paste the following codes above </head>
<script>
var numposts = 100;
var showpostdate = false;
var showpostsummary = false;
var numchars = 200;
</script>
<script>
function rp(json) {
document.write('<ul>');
for (var i = 0; i < numposts; i++) {
document.write('<li>');
var entry = json.feed.entry[i];
var posttitle = entry.title.$t;
var posturl;
if (i == json.feed.entry.length) break;
for (var k = 0; k < entry.link.length; k++) {
if (entry.link[k].rel == 'alternate') {
posturl = entry.link[k].href;
break;
}
}
posttitle = posttitle.link(posturl);
var readmorelink = "(more)";
readmorelink = readmorelink.link(posturl);
var postdate = entry.published.$t;
var cdyear = postdate.substring(0,4);
var cdmonth = postdate.substring(5,7);
var cdday = postdate.substring(8,10);
var monthnames = new Array();
monthnames[1] = "Jan";
monthnames[2] = "Feb";
monthnames[3] = "Mar";
monthnames[4] = "Apr";
monthnames[5] = "May";
monthnames[6] = "Jun";
monthnames[7] = "Jul";
monthnames[8] = "Aug";
monthnames[9] = "Sep";
monthnames[10] = "Oct";
monthnames[11] = "Nov";
monthnames[12] = "Dec";
if ("content" in entry) {
var postcontent = entry.content.$t;
} else if ("summary" in entry) {
var postcontent = entry.summary.$t;
} else
var postcontent = "";
var re = /<S[^>]*>/g;
postcontent = postcontent.replace(re, "");
document.write(posttitle);
if (showpostdate == true) document.write(' - ' + monthnames[parseInt(cdmonth,10)] + ' ' + cdday);
if (showpostsummary == true) {
if (postcontent.length < numchars) {
document.write(postcontent);
} else {
postcontent = postcontent.substring(0, numchars);
var quoteEnd = postcontent.lastIndexOf(" ");
postcontent = postcontent.substring(0,quoteEnd);
document.write(postcontent + '...' + readmorelink);
}
}
document.write('</li>');
}
document.write('</ul>');
}
</script>
4) Save the template.
5) Now create a new page.
Give a title to the page (sitemap or anything)
Select HTML section and paste the following script.
<script src="http://www.BlogName.com/feeds/posts/default?orderby=published&alt=json-in-script&callback=rp"></script>
Replace the red section with your domain.
Publish it.
Now you got the sitemap page in your blogger blog.

How To Change "View My Complete Profile" Text Of Profile Widget In Blogger
You are tired of seeing same text i.e "View My Complete Profile" in profile widget of every blogger blog. Its time for you to change the text of your profile widget in your own blogger blog. If you want to know how to change "View My Complete Profile" text in your profile widget in blogger blog, then you are in the right place. Today I will explain you how to change "View My Complete Profile" text in blogger blog. By using this trick you can show up your own text in place of the blogger's default text.
Steps:-
1) Go to the Edit HTML section of your template. Check in Expand Widget Template.
2) Now search the following codes in your template's widget section.
<a class='profile-link' expr:href='data:userUrl'><data:viewProfileMsg/></a>
3) Replace <data:viewProfileMsg/> with text you want to display instead of blogger's default text i.e "View My Complete Profile".
Example:
<a class='profile-link' expr:href='data:userUrl'>To know more about me click here</a>
4) Save the template and check your profile widget by visiting your homepage of your blog.
Numbered Page Navigation For Blogger
You have notice numbered page navigation in many blogs. This feature is not provided by blogger blogs. Instead blogger blogs provides older posts and previous posts links. Numbered page navigation not only helps in improving the look of the blogger blog, it also helps in faster navigation to older posts . This tutorial will help you in incorporating numbered page navigation in blogger blog.

Steps To Change Older Posts Link In Blogger With Numbered Page Navigation:-
1) Login to Blogger Dashboard and navigate to Layout > Edit Html
2) Press Ctrl + F and find ]]></b:skin>
and just above it paste the codes given below
3) Now Find </body>
and just above it paste the following codes
4) Save the template and its done.
This tutorial is based on Codes from Abu Farhan and Muhammad Rias. So if you plan to write this tutorial on your blog,do link back to them also.

Steps To Change Older Posts Link In Blogger With Numbered Page Navigation:-
1) Login to Blogger Dashboard and navigate to Layout > Edit Html
2) Press Ctrl + F and find ]]></b:skin>
and just above it paste the codes given below
.showpageArea a { text-decoration:underline; } .showpageNum a { text-decoration:none; border: 1px solid #cccccc; margin:0 3px; padding:3px; } .showpageNum a:hover { border: 1px solid #cccccc; background-color:#cccccc; } .showpagePoint { color:#333; text-decoration:none; border: 1px solid #cccccc; background: #cccccc; margin:0 3px; padding:3px; } .showpageOf { text-decoration:none; padding:3px; margin: 0 3px 0 0; } .showpage a { text-decoration:none; border: 1px solid #cccccc; padding:3px; } .showpage a:hover { text-decoration:none; } .showpageNum a:link,.showpage a:link { text-decoration:none; color:#333333; }
This was the CSS part for look and feel of the page navigation. You can modify it according to your need3) Now Find </body>
and just above it paste the following codes
<!--Page Navigation Starts-->
<b:if cond='data:blog.pageType != "item"'>
<b:if cond='data:blog.pageType != "static_page"'>
<script type='text/javascript'>
var pageCount=5;
var displayPageNum=5;
var upPageWord ='Previous';
var downPageWord ='Next';
</script>
<script src='http://bloggergadgets.googlecode.com/files/blogger_pagenavi_min.js' type='text/javascript'/> </b:if>
</b:if>
<!--Page Navigation Ends -->
4) Save the template and its done.
This tutorial is based on Codes from Abu Farhan and Muhammad Rias. So if you plan to write this tutorial on your blog,do link back to them also.
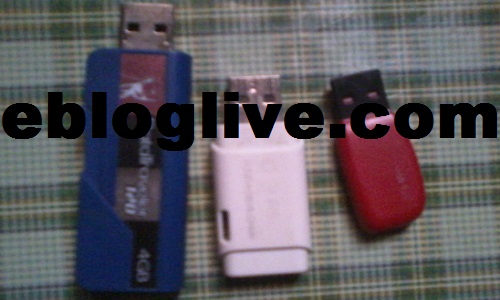
How To Burn ISO To USB And Make USB Bootable
Today we will teach you how you can burn ISO to a USB drive and make that USB drive bootable. To do this task we need a suitable software that can make your USB drive in bootable drive. You can use a software called Unetbootin for this purpose. This software has very simple interface and is very easy to use. Unetbootin is free of cost and you can download it from their official site. Unetbootin is available for windows, linux and Mac OS X users.
Subscribe to:
Posts (Atom)